Tutorial: Adding New Weapon Skins to Chivalry
If you find anything confusing about this article, or find errors, please send an email to Dylanbrady@tornbanner.com
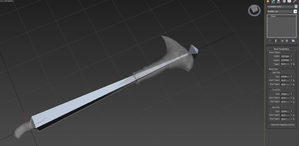
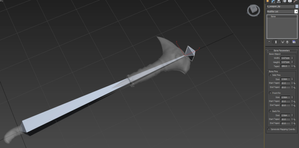
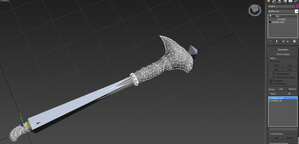
This tutorial will assume you understand the basics of 3d art generation, and have a finished weapon model ready to be implemented, if you dont have one you can download the example weapon below, or from our weapons specifications page for more information on creating video game assets, see our Workshop Page
Weapons must have the same proportions of the one they are modifying in important game play dependent areas. The "damaging" area of the weapon should not be mismatched in any way (length of a blade, placement of an axehead, etc) and the handle should match exactly wherever the hands of the character are to grip it, so as to avoid clipping through the fingers. For what weapons would fit in the game, and their style specification, see this page.
Your weapon .FBX file needs two bones: b_weapon_root and b_weapon_tip, you must use the source files for the weapon you will be replacing. This example will be using the Maul as a base, but see this page for the necessary source files if you wish to replace a different weapon. your new weapon needs to match the proportions of the model its replacing, most importantly the handle should be of similar thickness and length of the original, and your blade/damaging area should be in the same place, in order to avoid mismatch between the weapons visual size, and its gameplay size.
- -
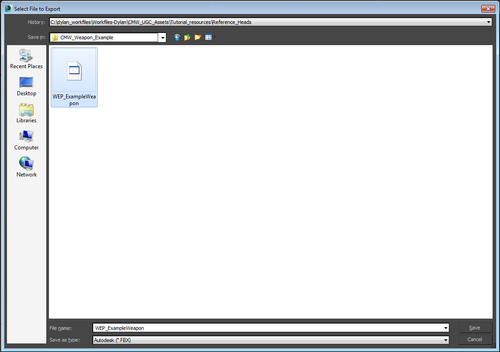
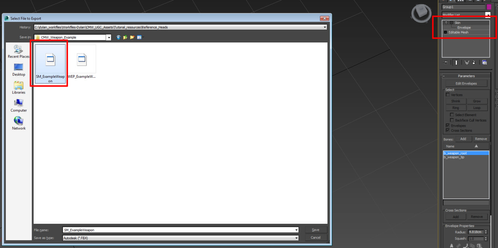
1.1 export the skinned version with the prefix WEP_ (for weapon)
1.2 now disable the skin, and export the mesh (without bones) with the prefix SM_ (for static mesh)
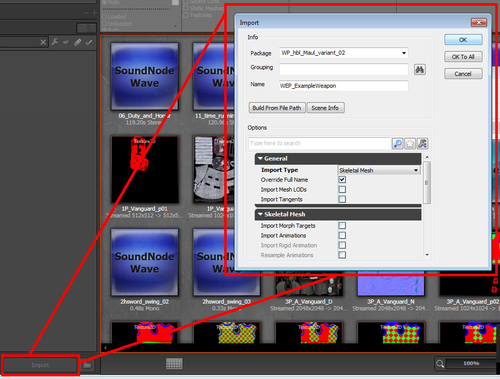
1.3 Now open up the editor and hit import at the bottom-left of the content browser. import your Skeletal mesh make sure to name your package with the following naming convention:
WP(weapon)_hbl(HeavyBlunt)_Maul(weapon name)_Variant_## (where ## is the number of your variant, check in the CookedPC folder to see if the weapon you are modifying already has some variants for it)
your new weapon will now be in the content browser!
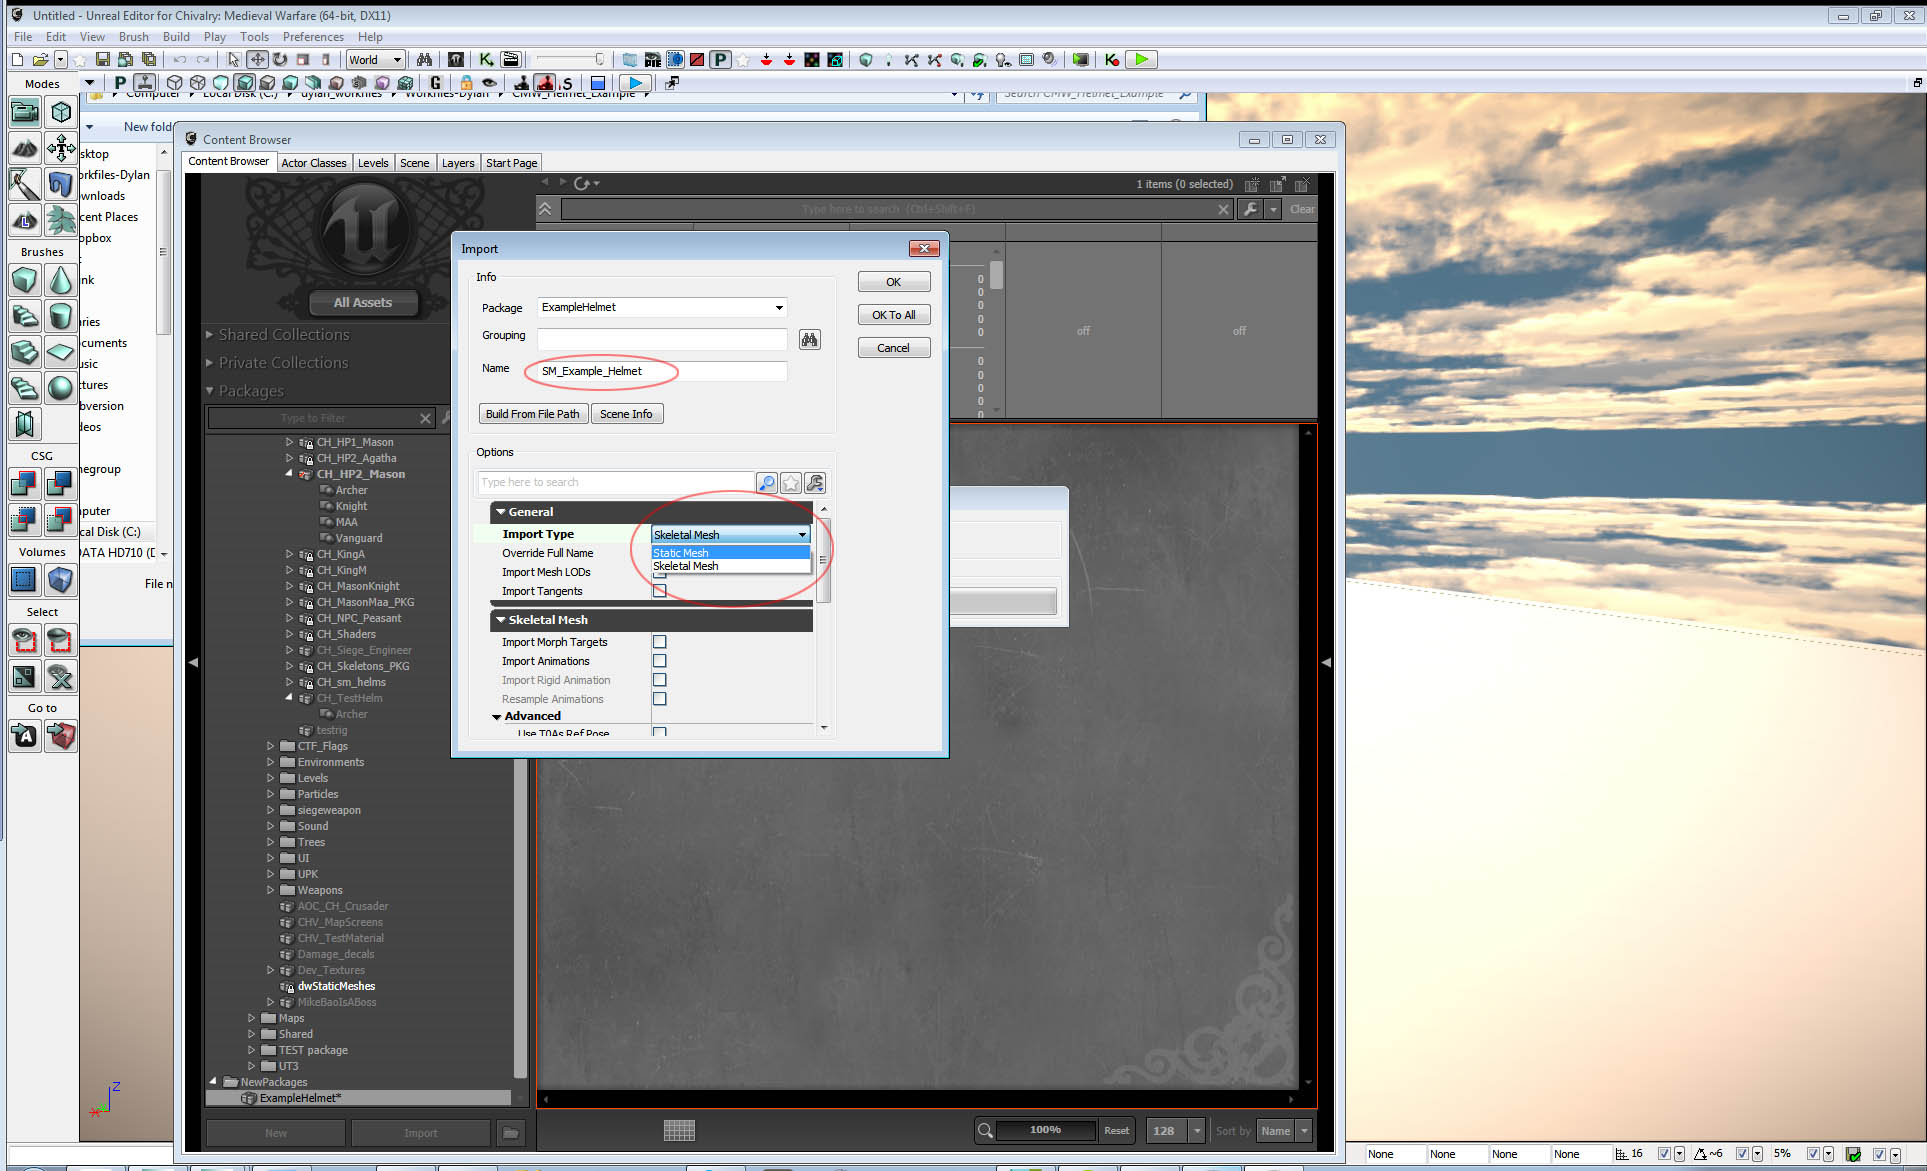
1.4 - Now import the Static mesh Set the Import type to Static mesh
1.5 - now import all the textures. remember to set the compression settings, check compression No Alpha, and set the texture LODGroup to the appropriate Texture Group. Don't forget to add the bloodmask!
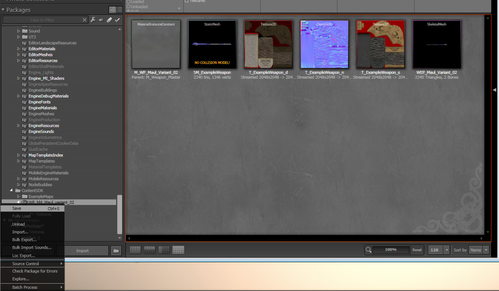
1.6 - At this point we have to save the package by right-clicking the package and selecting save , you must add any new content you are creating to the ContentSDK folder, not to cookedPC
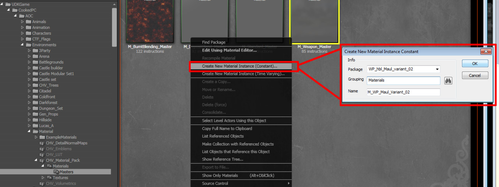
browse to C:\Program Files (x86)\Steam\SteamApps\common\chivalrymedievalwarfare\UDKGame\CookedPC\AOC\Environments\Material\CHV_Material_Pack\Materials\M_Weapon_Master
right click the material and hit create new material instance (constant) and type the name of your newly created package (WP_hbl_Maul_variant_02)
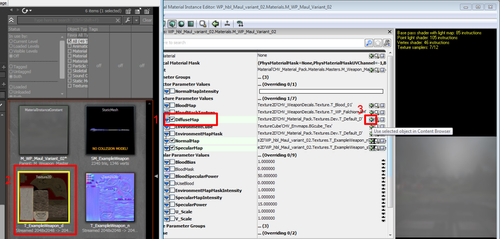
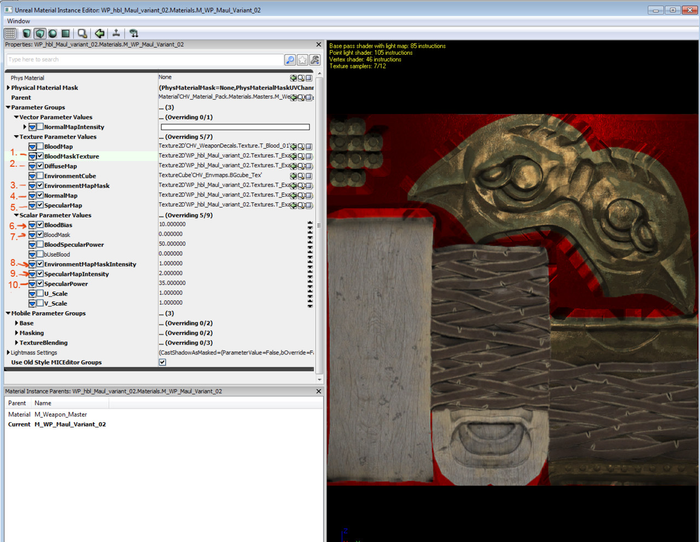
1.7 - double click on your material to open it. under the texture Parameter values, you'll find a directory pointing to a texture file. to set the material to use our weapon textures 1, check the box next to the map name 2, click on the texture in the asset browser 3, click on the green arrow next to the directory name. - do this for all the textures: diffuse, normal, specular, bloodmask, environment mask (for an explination of these look at the next step)
1.8 - weapons typically use the spec map to mask the environment map - we need to activate environment mapping. - in the Static Switch Parameter Values rollout, first make sure you check the box next to the element name, this will tell the shader to overriding the inherited value for this parameter. then activate or deactivate the element by checking the box to the right of the element name.
|
|---|
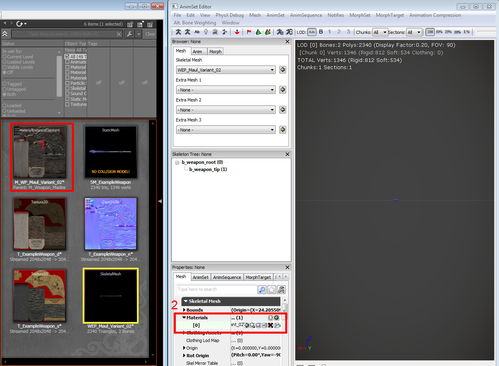
1.9 - now lets apply the material to our skeletal mesh - double click on it in the asset browser - in the skeletal mesh tab - under the materials rollout, you will find the material directory for each material ID on the skeletal mesh, since this object is using only one material theres only one slot. to use our created material first click on it in the assets browser, then click the green arrow on the right side, similar to the texture section.
Repeat this process for the static mesh (note the different location of the material slot)
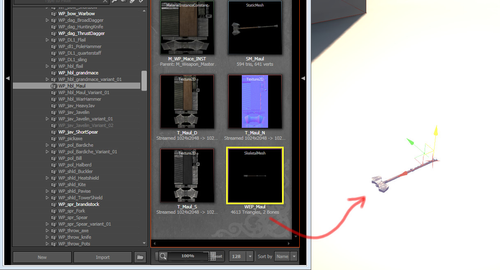
2.0 - now we need to make sure the weapon is aligned properly. to do this, browse to the base maul package, and drag the skeletal mesh into the level, it should snap to the ground.
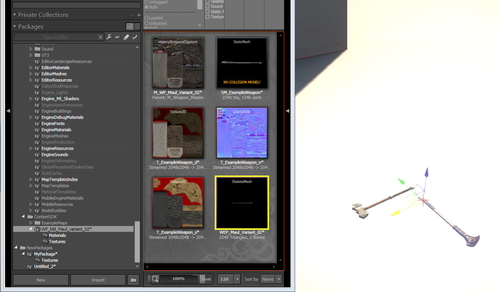
2.1 when we repeat this process for our new Maul replacement, we see it is rotated -90 degrees
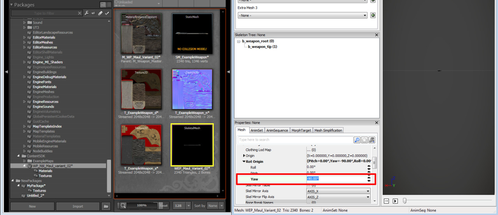
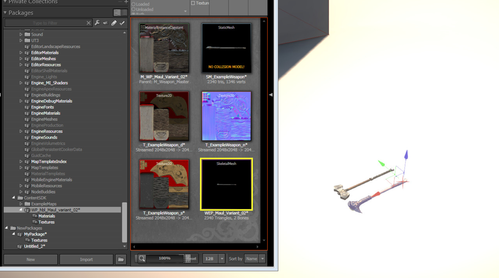
2.2 when we open the skeletal mesh and look in the Rot Origin rollout, we can see the Yaw section has a value -90 degrees, lets zero that out
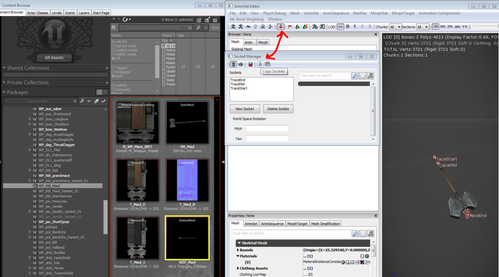
2.3 - now, we need to copy the sockets for our weapon so that the game will know how long the weapon is, to do this, well go into the base weapons skeletal mesh and open the socket managaer (in the top left) and click the scissores icon to copy the weapons sockets.
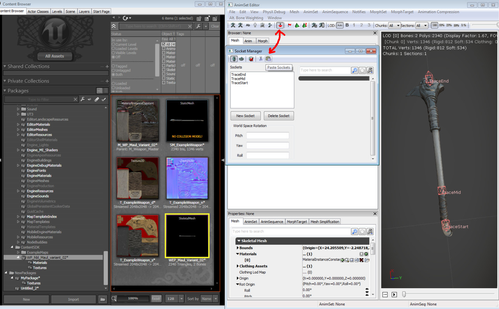
2.4 lets go back to our new weapon variant, in the skeletal mesh editor, and open the socket manager, this time well hit the folder icon to paste the sockets from our base Maul.
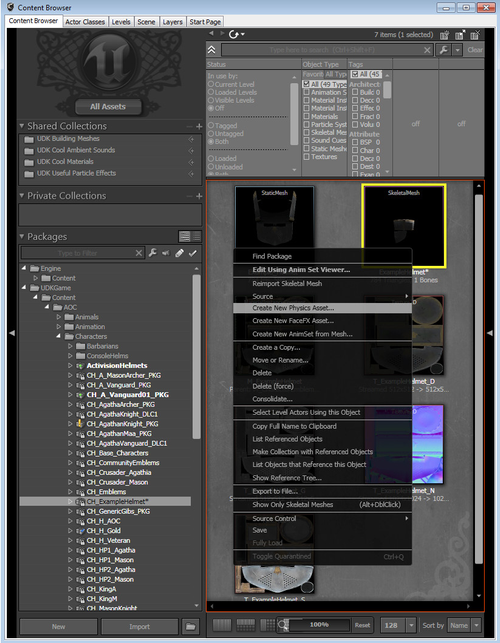
2.5 Now we need to create a Physics asset for our skeletal mesh, this ensures shadows get calculated accurately, it will improve the shadow quality and improve performance.
to create a simple physics asset, right click on the skeletal mesh of the weapon, and click create New Physics Asset. That's it!
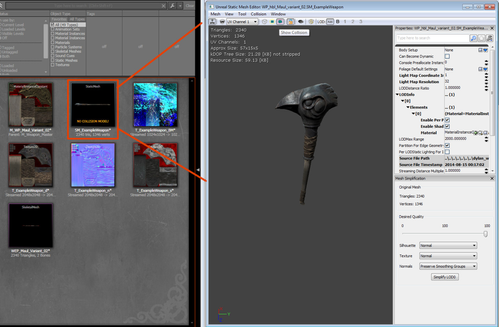
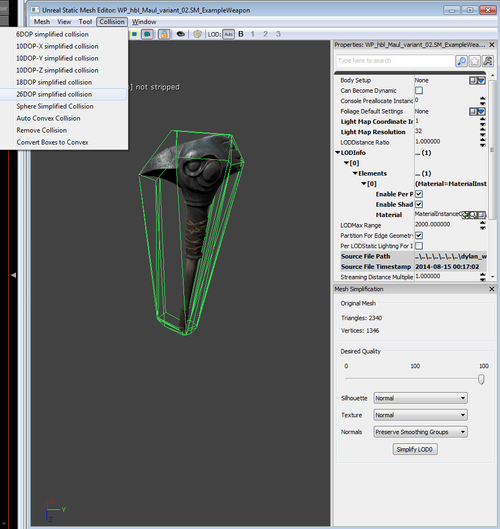
2.6 We also need collision on the Static mesh, so that when the character drops the weapon it will fall to the ground and interact with the world.
to create a collision, open up the static mesh, and click the small icon with a red outline.
2.7 next, open up the collision dropdown, and select one of the automatic collision options. for this example, were using 26DOP simplified collision, but Auto Convex Collision also can yield good results.
From here, be sure to create your bloodmask for the weapon using this tutorial: Bloodmask Tutorial
Thats the end, with all that done you should upload your .upk too the workshop and show it to the world! Who knows, maybe your weapon will be the next community favorite!
