Getting started with map editing
- Brady Brenot (Deactivated)
- Former user (Deleted)
- Lucas Annunziata (Unlicensed)
Chivalry: Medieval Ware is based on the July 2012 build of Unreal Engine 3, and its editor is nearly the same as the one that ships with the July 2012 UDK. This page cannot teach you how to create awesome maps on its own, but there's already a lot of information out there on mapping with other UE3 editors, most of which is directly applicable to Chivalry. Check out the Additional Resources page for some links we think are particularly helpful.
What follows is intended to be a supplement to the many UE3 editor resources out there. We'll explain the unique steps you need to take to create a Chivalry map.
The Editor
1) Opening the editor:
Open Steam and doubleclick on Chivalry: Medieval Warfare in your list of games to open the launcher. Click on 'Launch Editor' in the bottom left. This will open the SDK Frontend. Click on Launch Editor in the top bar of the Frontend.

2) Example maps:
To start, you might want to open one of our example maps. These are in chivalrysdkdirectory\UDKGame\ContentSDK. These maps demonstrate the actors, Kismet, and other features that are necessary to create maps in our different gamemodes. Some modes have specific needs; for instance, CTF needs flag positions.
3) Basic Map Creation:
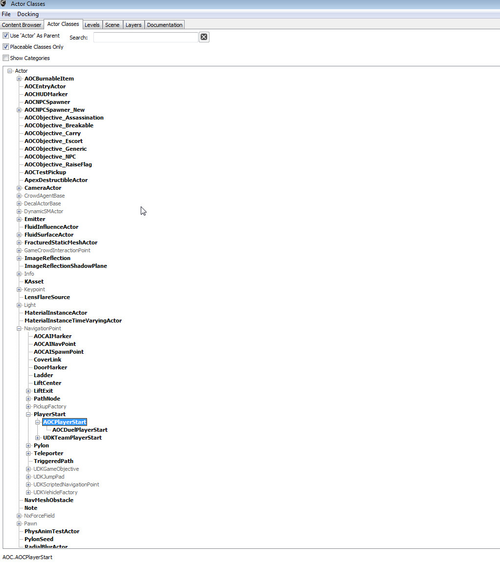
When you're creating a new map, the first step to making it playable is adding an AOCPlayerStart to the map. This can be done through the editor's Content Browser, under Actor Classes. You can drag and drop them into the level, or right-click and "add" when selected in the content browser.
Open the properties window (F4) and select the AOCPlayerStart you just added. Set its Player Start Faction property to match the team that should be able to spawn here, or EFAC_ALL for FFA (anyone can spawn here).

You also need to set the gametype in the world properties (menu bar: View >World Properties > Game Type) for both PIE (play in editor) and supported/default game types.
As a general note, avoid using Terrain for your maps, as it is a legacy item. Use Landscape.
https://udn.epicgames.com/Three/Landscape.html
4) Saving and cooking a map:
You should save your map with a name that starts with one of our gametype prefixes, and ends with _p (*unless it's a sublevel contained in another level). So for instance, Frigid's Team Deathmatch variant is AOCTD-Frigid_p
- Free-for-all: AOCFFA-mapname_p
- Duel: AOCDUEL-mapname_p
- Team Deathmatch: AOCTD-mapname_p
- Team Objective: AOCTO-mapname_p
- Capture the Flag: AOCCTF-mapname_p
- King of the hill: AOCKOTH-mapname_p
Once you're ready to save your new content, all your new packages (whether maps or asset packages) should be saved to UDKGame\ContentSDK. You can't modify existing Chivalry packages, so when you create or import an asset be sure you don't try to place it in one of our packages!
5) Running the game with uncooked content:
The packages you've saved into ContentSDK are "uncooked" You can test them directly by opening the "SDK - Launch game sdkcontent.bat" file located in the root of your Chivalry folder , which will load all the packages contained in ContentSDK. Open one of your custom maps by pressing ~ to open the console and typing 'open mapname'
Example: 
6) Cooking your new map(s):
To Cook your maps, go back to the SDK Frontend. 'Choose Add...' and select from the list of maps in your contentsdk folder to cook.
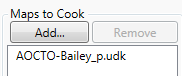
Click the cook button at the top of the SDK Frontend.

7) Running cooked content locally (maps, mods):
Launch the game as you normally would through Steam and the Chivalry Launcher. The game will load all packages in UDKGame\CookedSDK. Open one of your custom maps by pressing ~ to open the console and typing 'open mapname'
Example:
8) Testing cooked and uncooked packages on a server:
The next thing to do before releasing your map is to make sure it works on a server. This is especially critical if you're doing any complex Kismet, but this also lets other people test your levels with you can which can obviously be helpful on its own.
You can launch the game as a server by starting UDKEditor.exe (which doesn't trigger Steam to open) with "server" after it. See SDK - Launch server.bat, which launches a server on TD-Frigid, with admin password set to "testpass"
Connect to the server by opening your client, then entering open 127.0.0.1 into the console.
9) Uploading to the Steam Workshop:
Once you've tested your cooked maps on a server, you're ready to upload them. If a map is uploaded to the Workshop, people will be able to find, rate, and comment on it. Perhaps more importantly, server operators will be able to download the map from Steam, and any users who connect to servers with the map will automatically download it from the Workshop. This is pretty important.
See Uploading a Map or Mod to the Steam Workshop for information on how to upload files to the workshop.
More information
See Level Design for more Chivalry-specific level design information, and Additional Resources for other resources we think will be helpful in creating maps and other custom content.