...
| Note | ||
|---|---|---|
| ||
| Be careful: if you update your map or mod, server operators will have to update the package on their servers (rerun the download tool,) otherwise the version that clients autodownload won't match what's on the server. It's recommended that you include "WIP" ("work in progress") or "Beta" in the Workshop entry if you're regularly updating your map to let server operators know. |
Creating an upload info file:
...
Uploading:
After you cook, you'll notice that your mod package has cooked to a directory like UDKGame\CookedSDK\AOCSDKLevels_<GUID GOES HERE>. The bolded component there is the mod package's GUID. You'll want to save this GUID. In the future, when you want to recook this same map/mod package, you should add the guid to your cook command.
So, go ahead and copy SDK - COOK.bat and paste it into a new file. Call the new batch file something you'll remember that's related to your map's name. In this batch file, on the end of the last line, add:
| Code Block |
|---|
-Guid=xxx |
(So the line will look like .\Binaries\Win64\UDKEditor.exe CookPackages -log -nohomedir -platform=PC -SDKPackage=AOCSDKLevels MyAwesomeMap MyOtherMap -multilanguagecook=int -Guid=xxx )
Replace the "xxx" with the GUID of your new package directory. Now, when you cook again it'll replace the files in that directory instead of just creating a new one. This is very important if you want to use the Workshop since it lets you just update your existing item.
Creating the upload info file
Open up ChivlaryDirectory\UDKGame\CookedSDK\__CMWSDKFiles
...
$PackageDirectory "AOCSDKLevels_XXX"
$Description "Awesome Test Mod Description Large xxxxx"
$Title "Awesome Mod Title Large xxxxx"
$PreviewFile "test.jpg"
...
- $PackageDirectory – should correspond to your mod package subdirectory in CookedSDK. For instance, for a subdirectory at ChivlaryDirectory\UDKGame\CookedSDK\AOCSDKLevels_<GUID GOES HERE>, use "AOCSDKLevels_<GUID GOES HERE>"
- Map-only packages: make sure this is "AOCSDKLevels_xxx" (where xxx is your package's GUID); only packages with code will be "MyModName_xxx"
- $Description – the description that shows up in the Workshop. This can be edited after you've uploaded.
- $Title – the title that shows up in the Workshop. This can be edited after you've uploaded.
- $PreviewFile – a 512x512 image file which should be in the same directory (i.e. ChivlaryDirectory\UDKGame\CookedSDK\__CMWSDKFiles). You can use PNG or JPEG, though PNG is usually preferable (no compression artifacts)
Uploading:
| Note | ||
|---|---|---|
| ||
Mods with code changes will not upload to the Workshop for Release 1. The upload tool will partially work and will generate a .cmwsdk archive which you can then manually distribute to servers and clients, like you're already doing. Map-only mod packages are not affected by this restriction. |
If you created a new upload text file instead of saving over the existing one: edit the ChivlaryDirectory\SDK - UPLOAD TO WORKSHOP.bat batch file (Right click -> Edit will open it in Notepad). Change the name of the text file to match yours, so
| Code Block |
|---|
workshopusertool.exe wsinfo_SDKTest.txt
->
workshopusertool.exe wsinfo_MyAwesomeModName.txt |
Make sure Steam is running and you're logged into your account. Start the batch file. It should successfully create a .cmwsdk archive inside__CMWSDKFiles which contains your mod package, compressed. It'll also have uploaded your mod to the Workshophave created your map, it is time to upload it to the steam workshop. Thanks to the SDK Frontend tool that Torn Banner provides, this process is relatively painless.
Step 1:
Open the SDK Frontend. To do so, double click Chivalry: Medieval Warfare. On the launcher, click on 'Launch Editor'
Step 2:
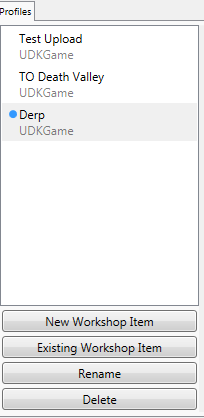
To create a new upload profile, click on 'New Workshop Item'.
Step 3:
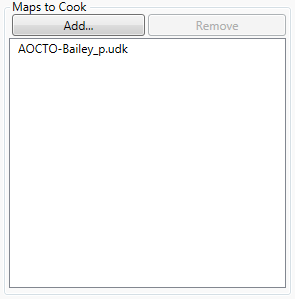
Under 'Maps to Cook' select 'Add...' and it will bring up a list of Maps that are located in you local /ContentSDK folder. If you are only Compiling a mod, you can skip this step and instead disable the cook packages feature in the top bar.
Step 4:
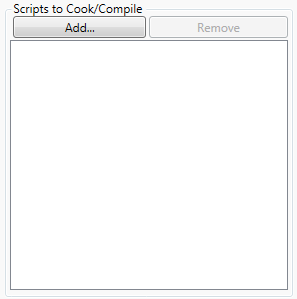
If your mod requires scripts, go Under 'Scripts to Cook/Compile' select 'Add...' and it will bring up a list of Maps that are located in you local /Development/Src folder. If you are only Cooking a map, you can skip this step and instead disable the compile scripts feature in the top bar.
Step 5:
Select the Item type

Step 6:
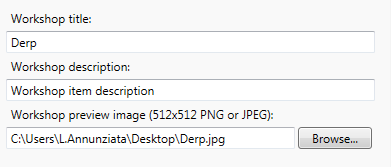
Give your Item a Workshop title, a description, and a preview image. These things can all be changed once you upload it to the Workshop as well.
Step 7:
Click the start button in the top left and wait for your map/mod to be cooked/compiled, then uploaded to the workshop.
Open Steam and browse to Chivalry's Workshop. If you click "Your Workshop Files" you should see your nice shiny new map/mod package.
Click on the item to get to your options.
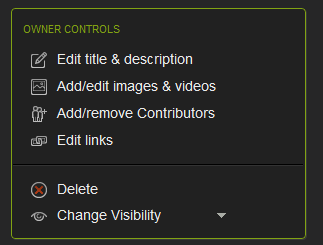
And to adjust the description, title, images, and whether or not it is visible to other users (they are visible by default), use the Owner Controls.
Running your Workshop-uploaded map on a server
...