Tutorial: Creating a new CustomizationContent script class for a mod so you can control character customization, as well as add helmets and other character assets
(aka. that tutorial with the needlessly long-winded title)
This requires a little content, and a little code. For the code section, I'm going to start from a mod I made using Tutorial: Creating a new mod, starting with the Instagib example. I'm going to whip through the content side and probably do things incorrectly.
Table of Contents
Content - let's add a helmet!
This is going to be a brief, rough, probably stupid overview of adding a helmet; Dylan's created a more detailed tutorial at Tutorial: Adding new helmets to Chivalry
First of all, create a helmet in some sort of 3D something-rather (creating 3D content is beyond the scope of this document / beyond my abilities and knowledge). Export it as an FBX, whatever that is.
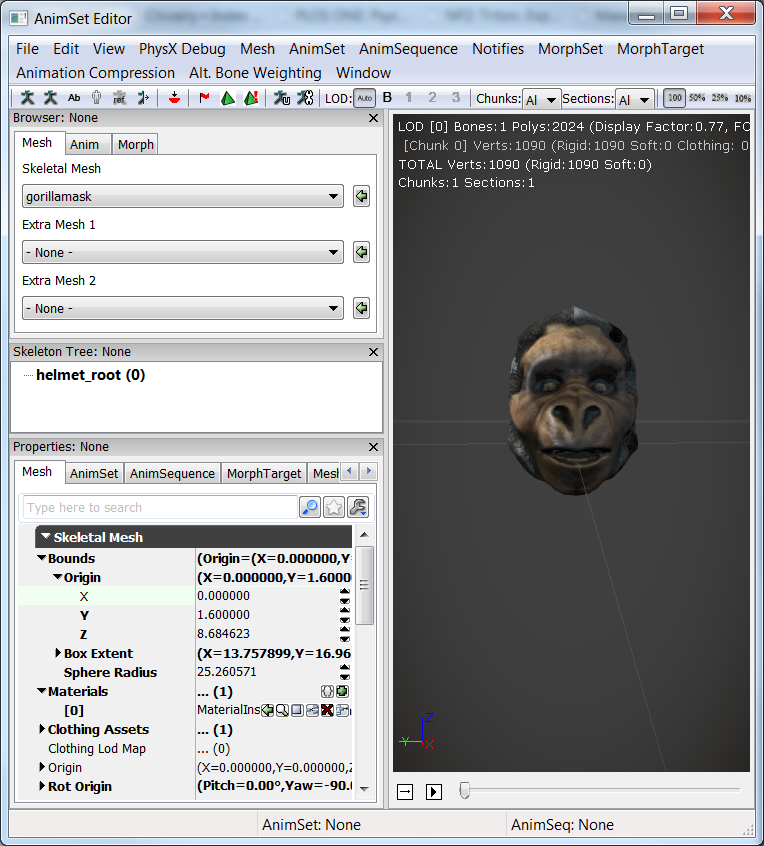
The example helmet that I'll be using for this tutorial is Tyler's brilliant monkey mask, which you can get right here: monkeyhat.zip yes, I know it's more of an ape. Feel free to reuse this asset in any Chivalry mod or map you want, if you really want a monkey head for some reason
Open the editor.
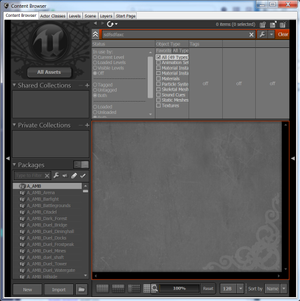
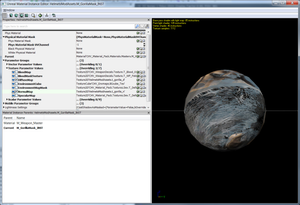
Drag the FBX into the content browser window in the editor; i.e. this thing:
Let go, and you'll get an import dialog. Make sure you change the "Package" to something related to your mod; either a totally new name for a totally new package for your mod, or an existing package you've already made. Here I'll call the package "HelmetsModAssets" because I'm going to call the mod "HelmetsMod" and because I'm extremely creative. I'm calling the skeletal mesh itself "gorillamask".
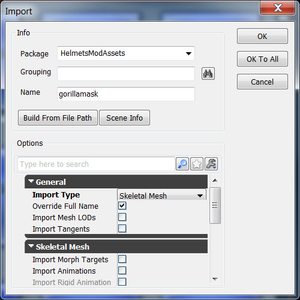
(More information on importing/exporting meshes can be found in various UE3 and UDK tutorials around the web).
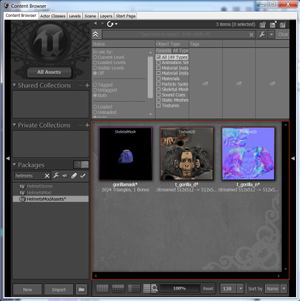
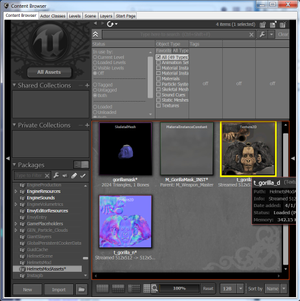
Let's pull in the diffuse and normal maps the same way, so now the package looks like:
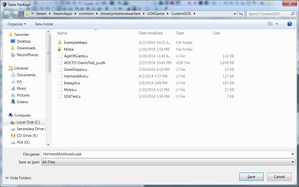
Now right click on the package on the left (or on any asset in the package on the right) and Save it. Save it in C:\Program Files (x86)\Steam\SteamApps\common\chivalrymedievalwarfare\UDKGame\ContentSDK (adjust the path to match where your Steam library is, of course). You can put it in a subdirectory within ContentSDK if you want to organize things, just bear in mind that SDK packages have to be in ContentSDK or a subdirectory therein. I'm going to save my package as ContentSDK\HelmetsModAssets.upk:
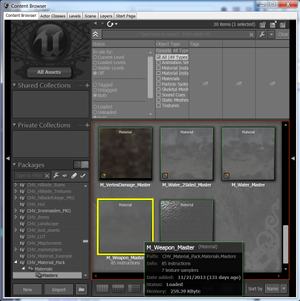
You're going to want a material so you can use those nice textures on your nice helmet. Chivalry's helmets seem to like to use M_Weapon_Master, so let's use it ourselves. Find that material in the ContentBrowser
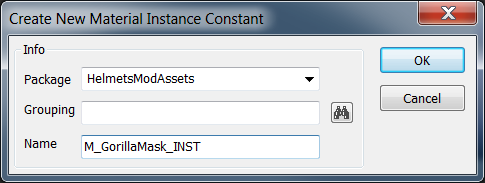
Right click on it, create a new Material Instance Constant. Be sure you put it in your new package, and give it a nice name!
Override the NormalMap and DiffuseMap in the material instance. To do this:
- Double-click your new instance to open the Material Instance Editor
- Expand Parameter Groups and Texture Parameter Values, find Normal Map and Diffuse Map
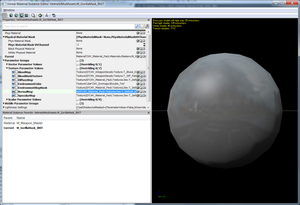
- In the content browser, click on the diffuse map to highlight it
- In the Material Instance Editor, click the green arrow beside DiffuseMap, and check the box next to it
- Repeat for the normal map
Yes, it's kind of shiny, that's what we get for using this material for a monkey head. If you care, you can turn the EnvironmentMapMaskIntensity and SpecularMapIntensity parameters to 0, or use a different material, or...
Now double-click your skeletal mesh to open the Editor for that thing. At the bottom-left, expand the Skeletal Mesh category and Materials
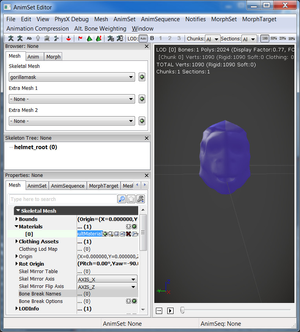
Assign your new Material Instance to this material using that green arrow and the Content Browser.
Save the package again, and we're done the content bit!
(Again, though, I glossed over a lot here. Be sure to look at Tutorial: Adding new helmets to Chivalry if you're doing this for real)
Code - modding the customization system
Again, I'm going to start from a mod I made using Tutorial: Creating a new mod, starting with the Instagib example
The full source for this example is at https://github.com/BradyBrenot/chivalry-helmetsmod
My mod is going to be called "HelmetsMod"
AOCCharacterInfo
"AOCCharacterInfo" is the class that defines a single way that a pawn can look in the game, including its model, material, and animation sets. It also provides a list of acceptable helmets and other customizables for the character. We're going to need at least 10 of these for our mod, one for every class on every team (including the King) – if you don't want a unique appearance per class per team, you could go with fewer, but this tutorial will just follow vanilla Chivalry's lead here. We'll subclass the existing ones from Chivalry; these can be found in Development/Src/AOCCustomizationContent/classes. Let's look at one of the subclasses I've created to add our new hat:
class HelmetsModCharacterInfo_Agatha_Archer extends AOCCharacterInfo_Agatha_Archer;
defaultproperties
{
	Helmets.Empty
	Helmets.Add((SkelMesh=SkeletalMesh'HelmetsModAssets.gorillamask',   HelmetStaticMesh=StaticMesh'HelmetsModAssets.gorillamask_static',     GearData=(GearNameID=DefaultHat)))
}
That's it! All I've done here is subclass the vanilla Chivalry Agatha Archer character, AOCCharacterInfo_Agatha_Archer. Then, in the defaultproperties block, I cleared out that CharacterInfo's Helmets array, and then added my own helmet. You'll notice that it needs both a static and a skeletal mesh; I didn't show importing a static mesh above, but you can sort of guess, or read Tutorial: Adding new helmets to Chivalry.
Quick tip for getting an asset's full name to put in scripts: right click the asset in the Content Browser in the Editor, and click "Copy Full Name To Clipboard".
Anyways, that's all you have to do for the 10 classes. I'll omit the actual code (you can always just look at the final example on GitHub), but I ended up with HelmetsModCharacterInfo_Agatha_Archer.uc, HelmetsModCharacterInfo_Agatha_King.uc, HelmetsModCharacterInfo_Agatha_Knight.uc, HelmetsModCharacterInfo_Agatha_ManAtArms.uc, HelmetsModCharacterInfo_Agatha_Vanguard.uc, HelmetsModCharacterInfo_Mason_Archer.uc, HelmetsModCharacterInfo_Mason_King.uc, HelmetsModCharacterInfo_Mason_Knight.uc, HelmetsModCharacterInfo_Mason_ManAtArms.uc, and HelmetsModCharacterInfo_Mason_Vanguard.uc
AOCCustomization and AOCCustomizationContentBase
AOCCustomization is the class that handles customization-related operations, including loading customizations, saving them, determining if they're valid for a player, etc.
AOCCustomizationContentBase is the class that contains references to the actual customization data, including the CharacterInfos and all they contain.
We need to subclass both of these; we need to subclass AOCCustomizationContentBase because that's what actually contains references to the CharacterInfos, we need to subclass AOCCustomization to point to that.
AOCCustomization
This is easy, since it's just pointing at our AOCCustomizationContentBase
class HelmetsModCustomization extends AOCCustomization;
defaultproperties
{
	CustomizationContentClassString="HelmetsMod.HelmetsModCustomizationContent"
}
AOCCustomizationContent
This one's a little more detailed, let's just step through some of it. First up: the class declaration and GetDefaultCharacterIDFor. Code first:
class HelmetsModCustomizationContent extends AOCCustomizationContent;
static function int GetDefaultCharacterIDFor(int Team, int PawnClass)
{
	LogAlwaysInternal("GetDefaultCharacterIDFor"@Team@PawnClass);
	switch(PawnClass)
	{
	case ECLASS_Archer:
		return Team == EFAC_Agatha ? default.Characters.Find(class'HelmetsModCharacterInfo_Agatha_Archer') : default.Characters.Find(class'HelmetsModCharacterInfo_Mason_Archer');
		break;
	case ECLASS_ManAtArms:
		return Team == EFAC_Agatha ? default.Characters.Find(class'HelmetsModCharacterInfo_Agatha_ManAtArms') : default.Characters.Find(class'HelmetsModCharacterInfo_Mason_ManAtArms');
		break;
	case ECLASS_Vanguard:
		return Team == EFAC_Agatha ? default.Characters.Find(class'HelmetsModCharacterInfo_Agatha_Vanguard') : default.Characters.Find(class'HelmetsModCharacterInfo_Mason_Vanguard');
		break;
	case ECLASS_Knight:
		return Team == EFAC_Agatha ? default.Characters.Find(class'HelmetsModCharacterInfo_Agatha_Knight') : default.Characters.Find(class'HelmetsModCharacterInfo_Mason_Knight');
		break;
	case ECLASS_King:
		return Team == EFAC_Agatha ? default.Characters.Find(class'HelmetsModCharacterInfo_Agatha_King') : default.Characters.Find(class'HelmetsModCharacterInfo_Mason_King');
		break;
	case ECLASS_Peasant:
	default:
		return default.Characters.Find(class'AOCCharacterInfo_Peasant');
	};
}
GetDefaultCharacterIDFor is the function that lets AOCCustomization know which AOCCharacterInfo (actually, which index into the Characters array) to associate with what Team/Class, assuming the player hasn't manually chosen a different Character in the Customization screen. Here I've just changed it to point to our new characters. Pretty straightforward, eh? Now for the defaultproperties block, which actually contains the character and team lists.
defaultproperties
{
	Characters.Empty

	//Going to keep the same order as in AOCCustomizationContent so users' choices remain
	Characters.Add(class'AOCCharacterInfo_Skeleton') //Placeholder invalid entry
	Characters.Add(class'AOCCharacterInfo_Skeleton')

	//We're only going to bother replacing playable characters
	Characters.Add(class'HelmetsModCharacterInfo_Agatha_Archer')
	Characters.Add(class'HelmetsModCharacterInfo_Agatha_King')
	Characters.Add(class'HelmetsModCharacterInfo_Agatha_Knight')
	Characters.Add(class'HelmetsModCharacterInfo_Agatha_ManAtArms')
	Characters.Add(class'HelmetsModCharacterInfo_Agatha_Vanguard')
	Characters.Add(class'HelmetsModCharacterInfo_Mason_Archer')
	Characters.Add(class'HelmetsModCharacterInfo_Mason_King')
	Characters.Add(class'HelmetsModCharacterInfo_Mason_Knight')
	Characters.Add(class'HelmetsModCharacterInfo_Mason_ManAtArms')
	Characters.Add(class'HelmetsModCharacterInfo_Mason_Vanguard')

	Characters.Add(class'AOCCharacterInfo_Peasant')
	//Not going to bother doing the DLC characters, so I'm not even going to include them.
	//You could also replace them if you want players to be able to use them, I'm just omitting them for brevity.

	//Also not bothering to replace the teams, but you can do that if you want
	Teams.Empty
	Teams.Add(class'AOCCustomizationTeam_Agatha')
	Teams.Add(class'AOCCustomizationTeam_Mason')
	Teams.Add(class'AOCCustomizationTeam_FFA')
}
Here I've copied what AOCCustomizationContent.uc does, but I've changed the characters to point to my modded ones, and I've removed the DLC characters because I'm too lazy to also mod them.
We're nearly done now, we just need to point the PlayerController, Pawn, and GameInfo at our new Customization class.
Pawn, GameInfo, and PlayerController changes
Pawn
We just need to add a line to defaultproperties to point to the new Customization class:
defaultproperties
{
	CustomizationClass=class'HelmetsModCustomization'
}
GameInfo
The customization class reference is hardcoded here, but it's saved to a variable so it's easy enough for us to change
event InitGame( string Options, out string ErrorMessage )
{
	super.InitGame(Options, ErrorMessage);

	CustomizationClass = class'HelmetsMod.HelmetsModCustomizationContent';
}
PlayerController
Finally, the PlayerController. This is similar to the Pawn, but you're going to notice something funny here:
var HelmetsModCustomizationContent CustomizationBaseDummy;

defaultproperties
{
	CustomizationClass=class'HelmetsModCustomization'
}
That variable up at the top isn't used anywhere, so why did I add it? If you look back at all the other code, we don't have any direct references to class'HelmetsModCustomizationContent' anywhere other than the GameInfo. We have strings that contain the class's name, but that's it. When the game is running on a client the GameInfo doesn't exist, so as far as the game can tell, it doesn't need to bother loading class'HelmetsModCustomizationContent', and it won't. You could get around this with a DynamicLoadObject, but this dummy variable works just as well and doesn't require that I figure out where the heck to put a DLO so that it actually works.
That's it!
You've made it through the tutorial, pat yourself on the back, compile and cook the thing, and try it out.
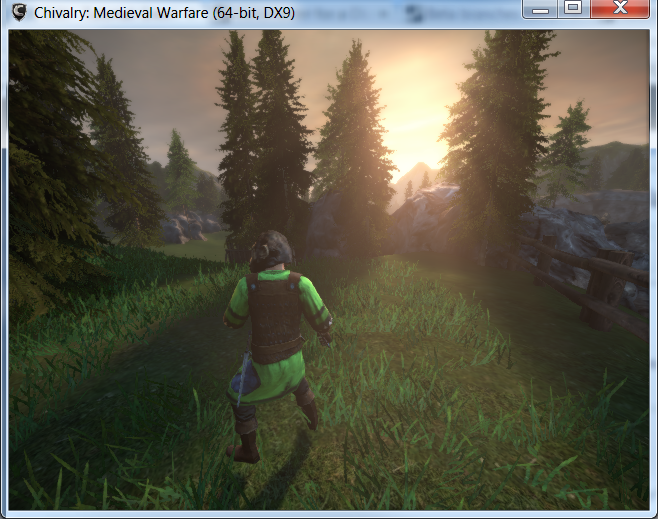
(Yep, that monkey head is rotated 90 degrees. Too bad I didn't follow Tutorial: Adding new helmets to Chivalry and didn't rotate the SkeletalMesh so it's oriented properly. Oh well!)
The full code for this tutorial is available at: https://github.com/BradyBrenot/chivalry-helmetsmod
Further reading
Customizing characters is essentially similar as I hope you can realize by now (if you haven't realized it, look at Chivalry's CharacterInfo classes, ;;;;;;;;;;;; ). Characters are more involved from the content creation side though (blahblah etc.)
A better guide on the content side of adding a helmet to the game can be found at Tutorial: Adding new helmets to Chivalry