Here, I will go into detail on how to setup and objective similar to the Peasant Killing in Stoneshill and Dark Forest. I will be using the example map AOCTO-2-PeasantKiller. Functionality that will be detailed:
--
Creating A Kill Objective:
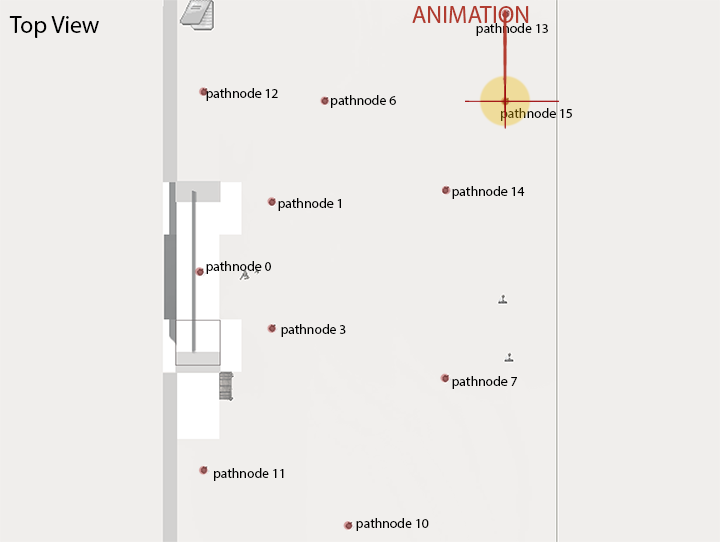
The only actors used for the Objective in the world, are an AOCObjective_Generic, AOCHudmarker, and Path Nodes for the Peasants to spawn and move to. Path Nodes can be place wherever desired, though I will be using the example map setup. The initial Kismet setup is the same as covered in previous documentation for Initial Setup, thus I will not go too far into detail.
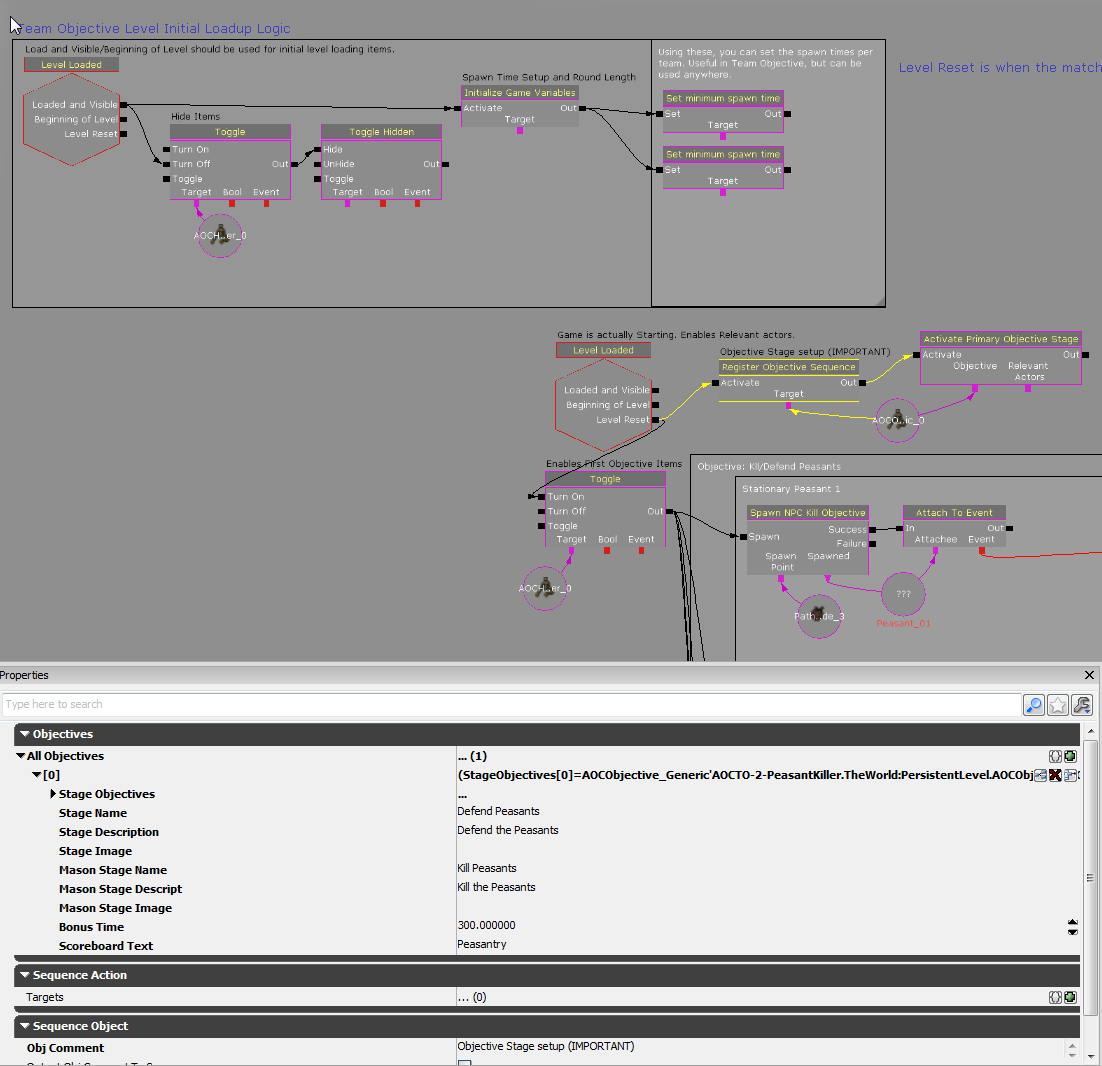
Spawning Peasants:
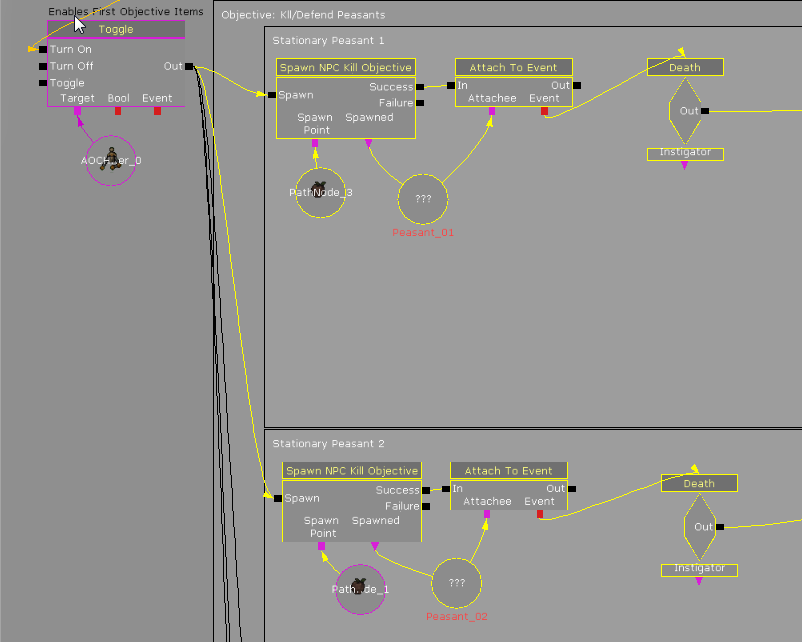
Peasants will be spawned on Level Reset. This prevents players from killing them before the game begins. The Toggle here acts as branch to spawn all the Peasants. It hooks into several Spawn NPC Kill Objective actions. These actions are where all the settings for the Peasants are configured, such as skeletal mesh, class, faction, speed, health, and so on. This is also where the spawn point, and variable for the bot are assigned. The ??? variable is an object variable, which is found in variables, or by holding "O" and left clicking. The attach to Event is just a way of recognizing in Kismet that the Peasant has died. It is used to keep track of how many Peasants are killed towards the desired goal, in this case (5).
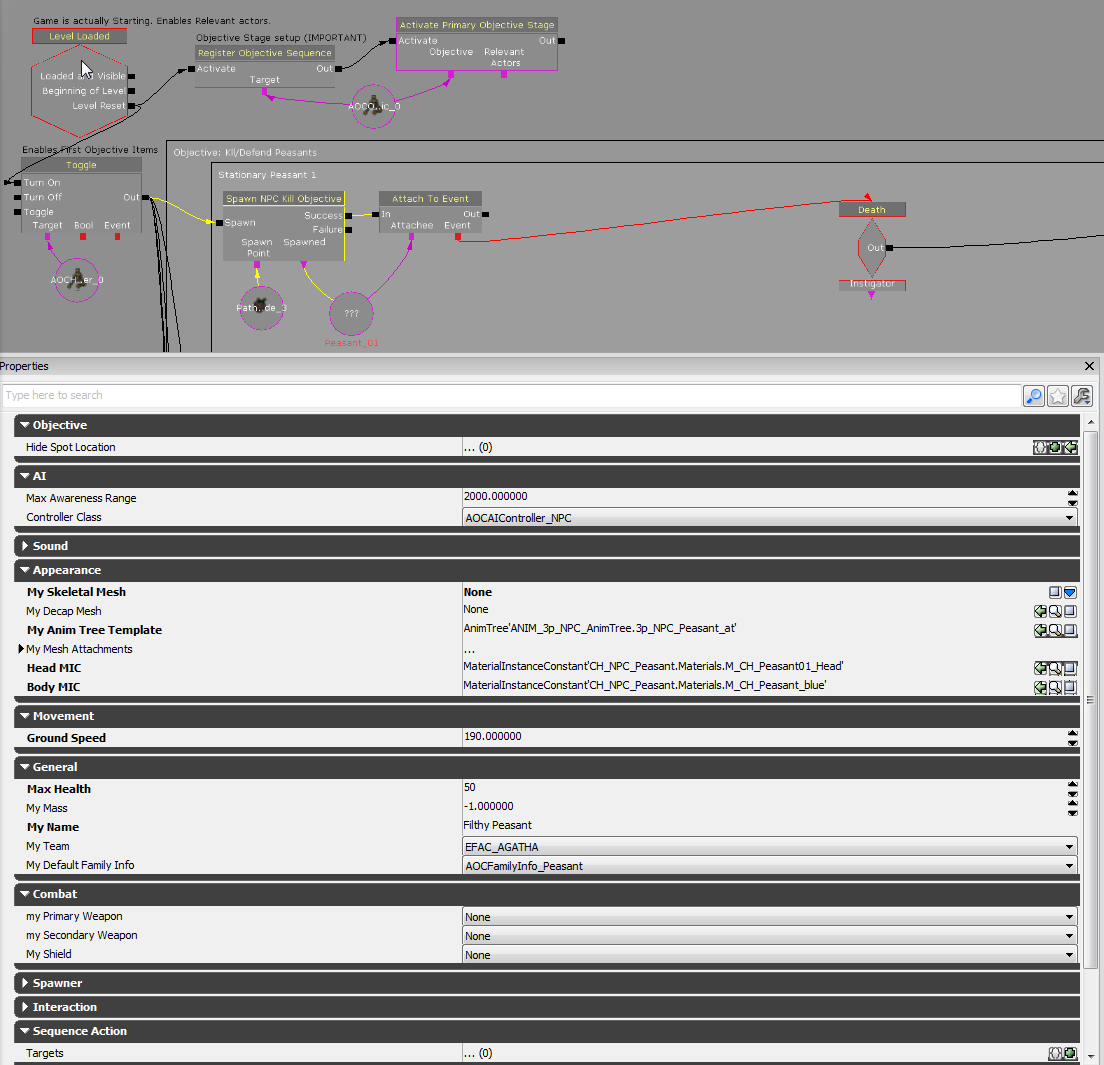
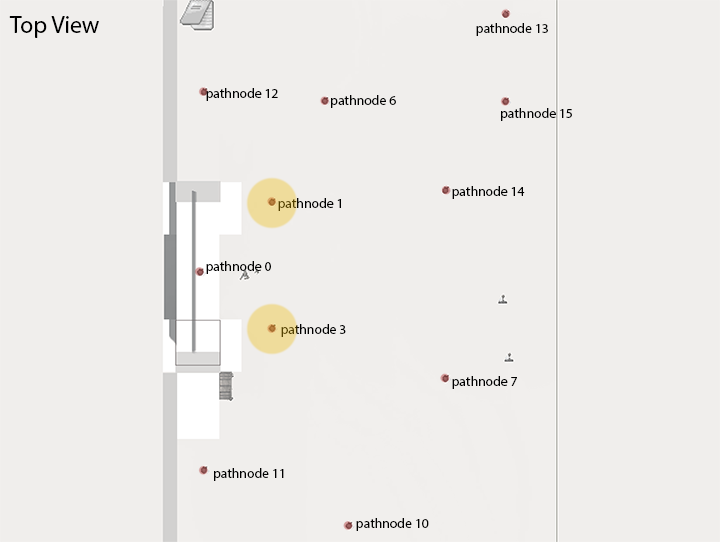
The first two peasants that will spawn are simple. They will just stand in place and wait to be killed. They will be spawning on Path Node (3) and (1).
Peasants moving from point to point:
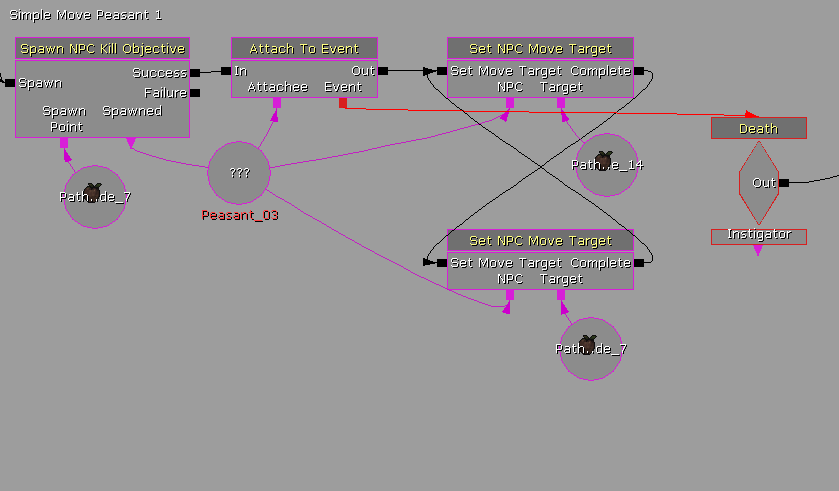
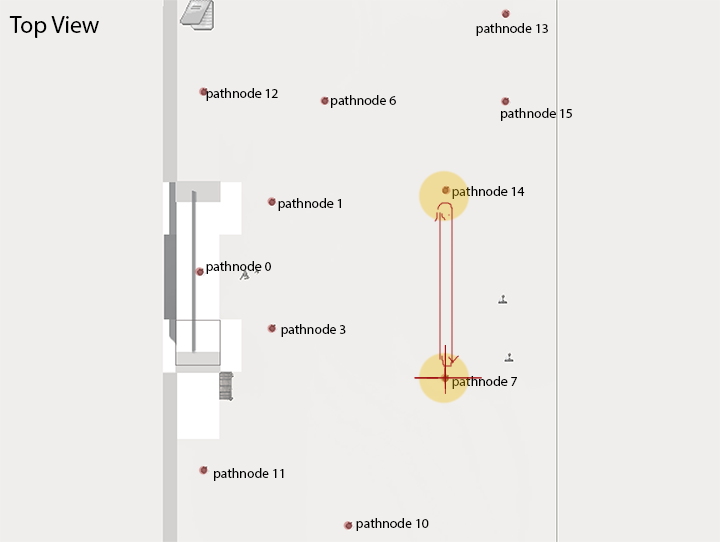
This Peasant will spawn on Path Node (7). The output of it's Death Event will go into a Set NPC Move Target Kismet Action. This Peasant will run to Path Node (14), then circle back to where it originally spawned at Path Node (7). this effectively creates an endless loop of running back and forth until death.
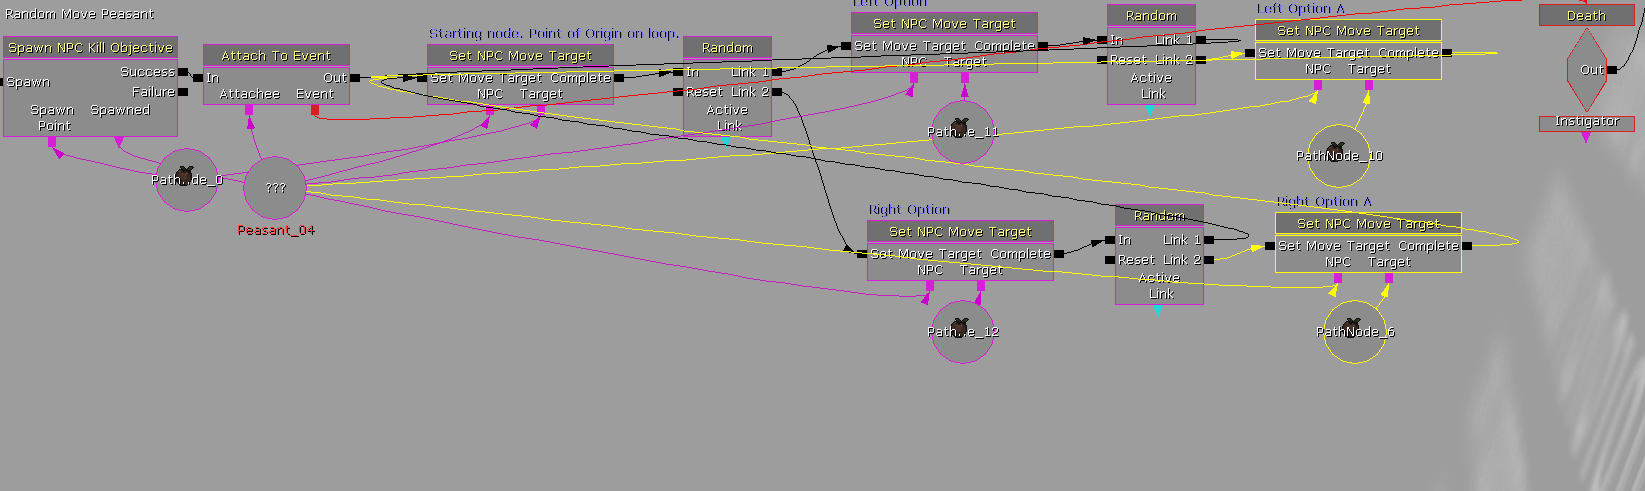
Random move Peasants:
A more complex example. A random move. The Peasant spawns, then has random branching paths. All of these paths lead back to the "Point of Origin" at some point, which is where the Peasant initially spawns, and starts the controlled random move over. I will break it down further in images following.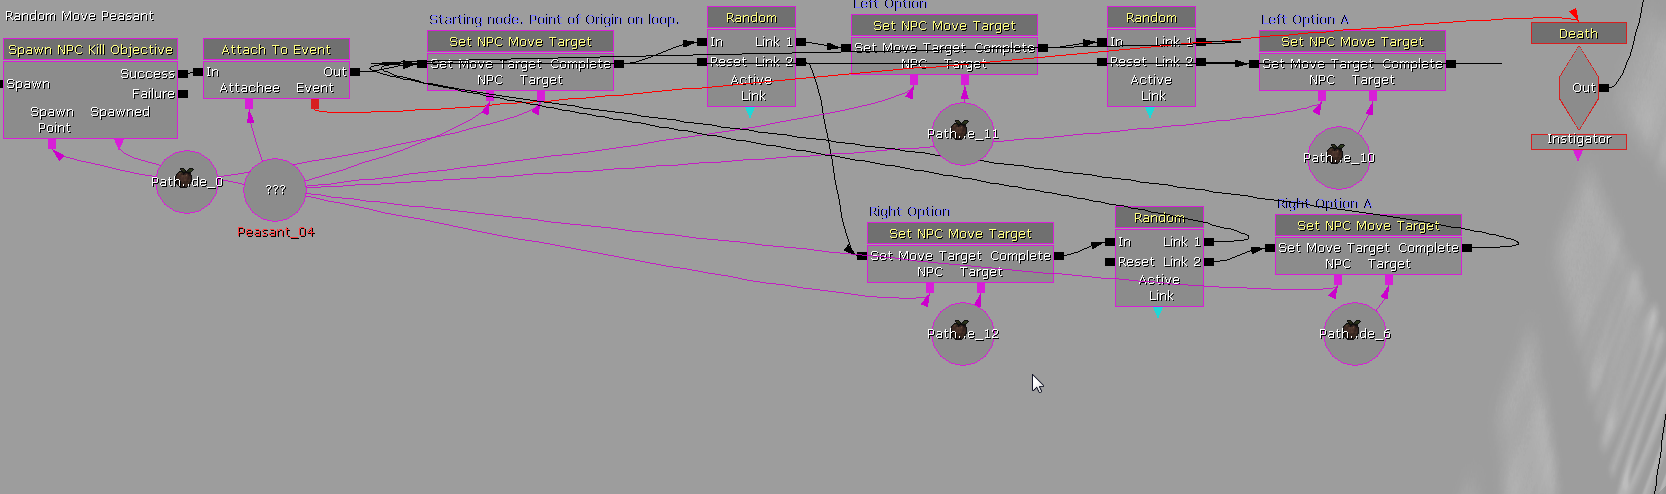
Now for the breakdown. The first Set NPC Move Target is the point of origin, and where all paths eventually feed back into. It connects to the input of a Random Switch. What this Random Switch does, is upon activation, it generates a random number, and fires that output. So if it generates (1), it will feed into the path i have labeled "Left Option." If (2) is generated, it will activate the "Right Option."
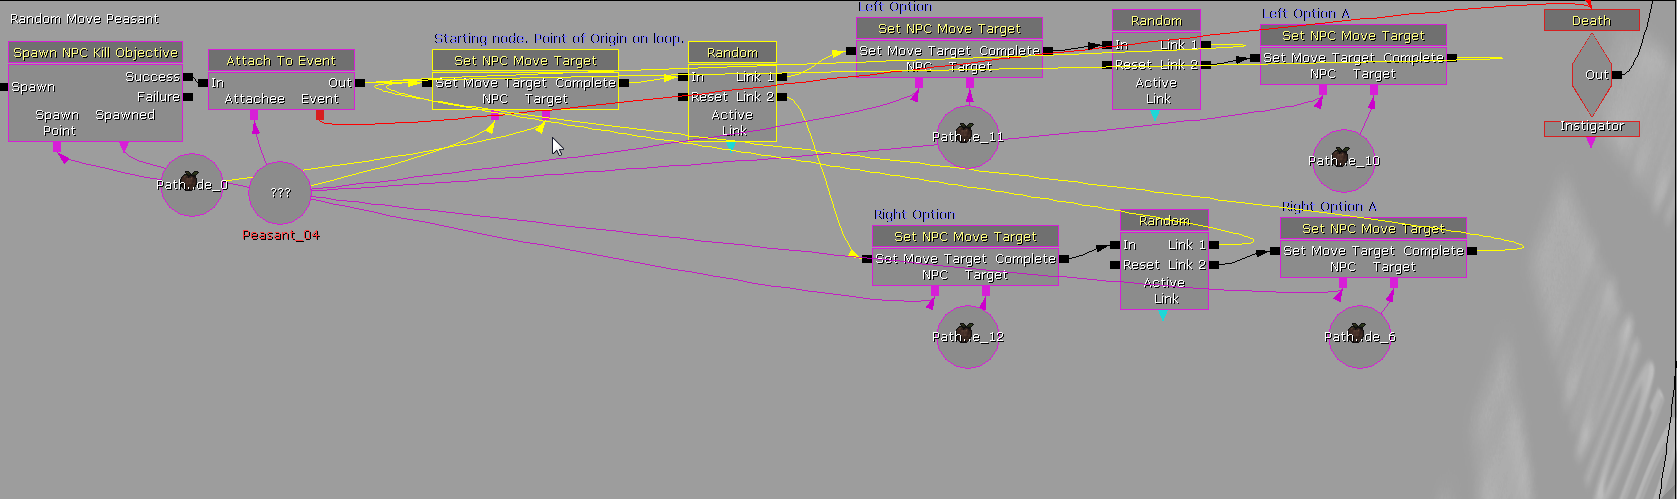
Each of the Options are doing exactly what the Point of Origin was doing. They have their own Random Switches, which either connect to "Left Option A" on Link (2) or take the Peasant back to the Origin with Link (1). The links are reversed for the right option, which I may update in a later map.
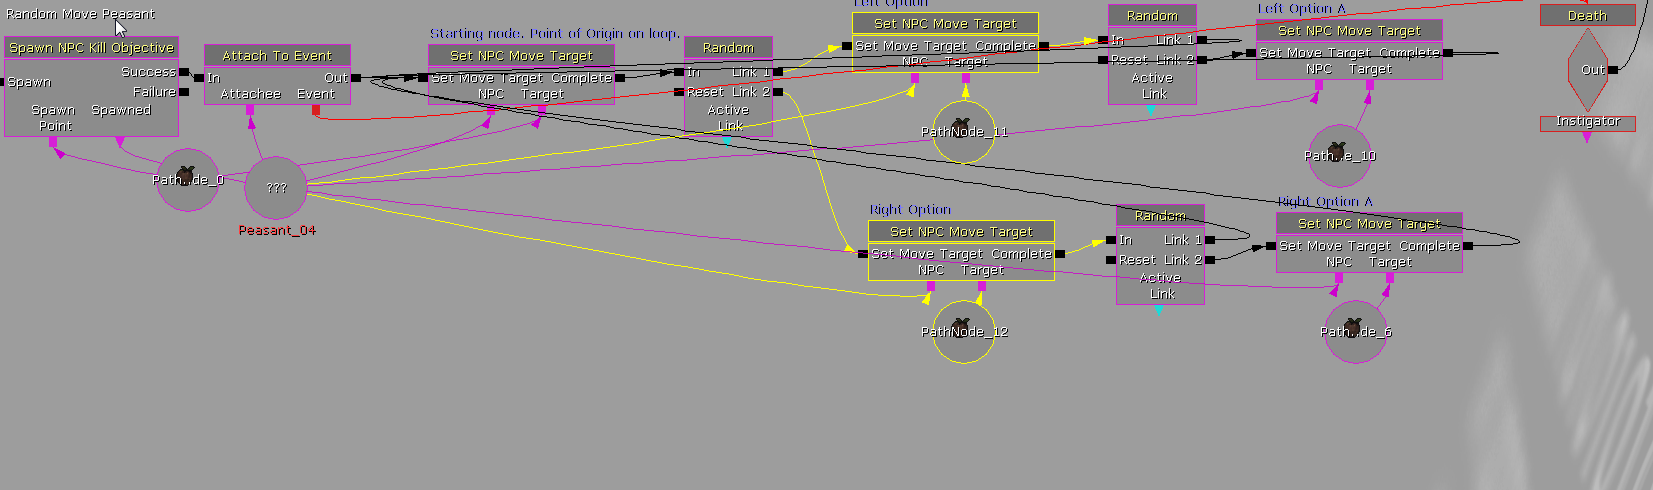
If all the links fire to get the Peasant to Option A, it will take the Peasant to the Origin.
Peasants stop and play animation:
In this example, the Peasant will run to a point, then upon arrival, play one of three random animations. Most of the nodes up to the Random Switch were covered in the previous example, so I will be jumping ahead to the NPC Play Anim actions in the breakdown.
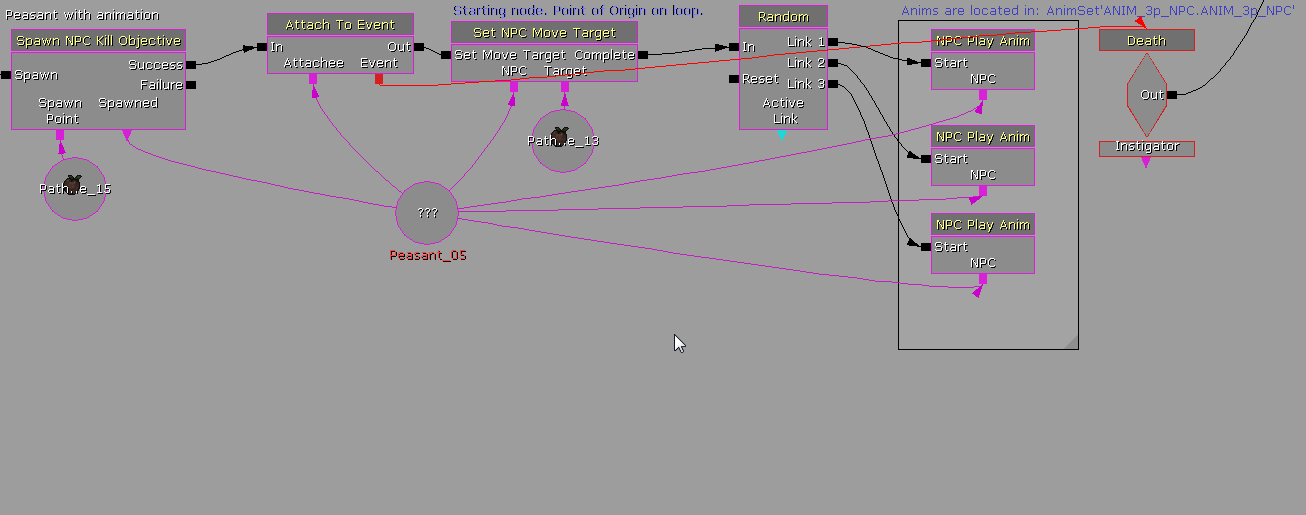
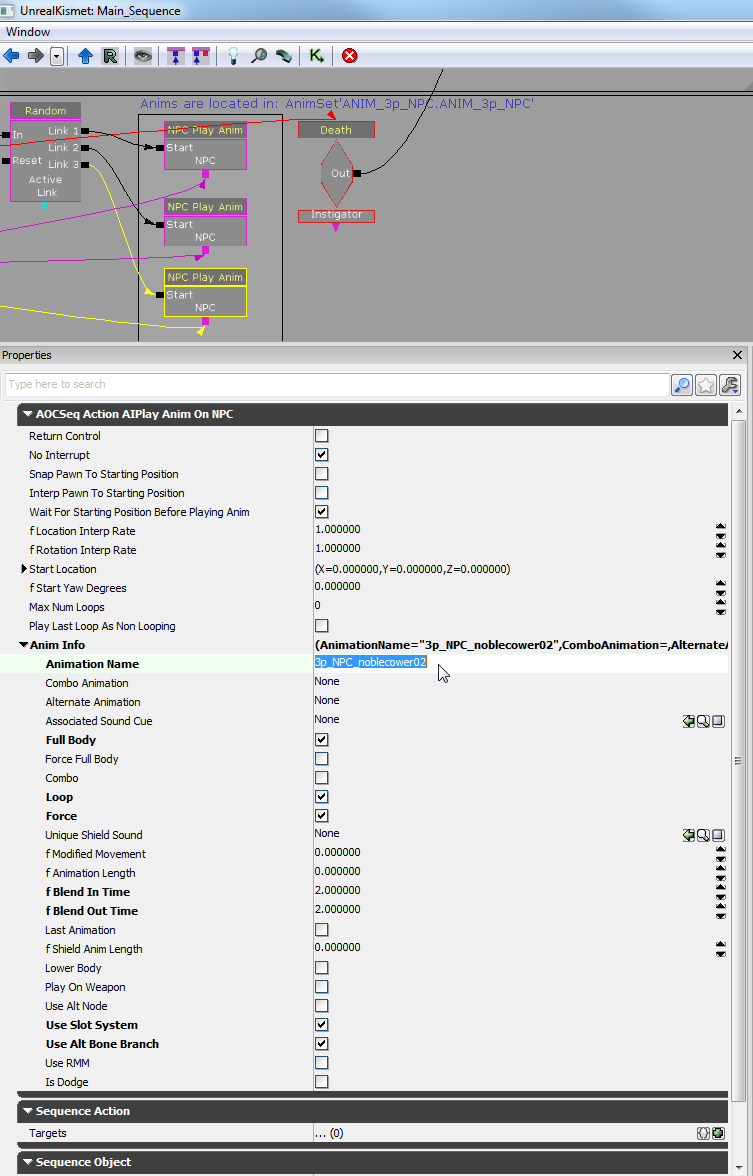
NPC Play Anim is an action that will allow you to drive the animations on an NPC bot using any of the game's animations. The properties window will reveal a multitude of options.
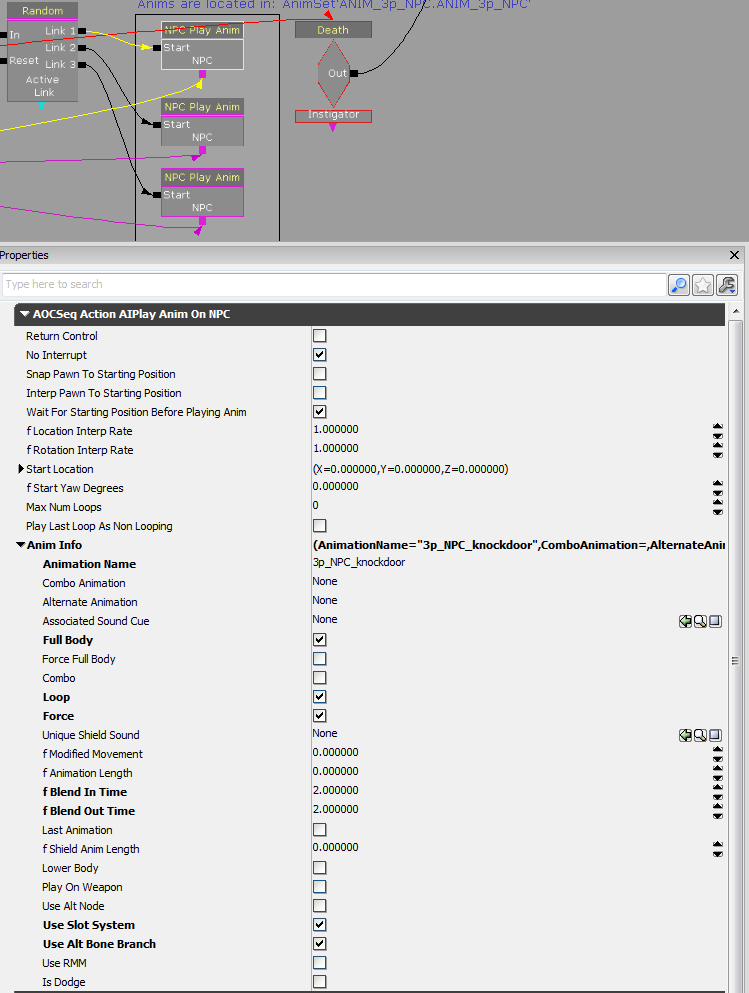
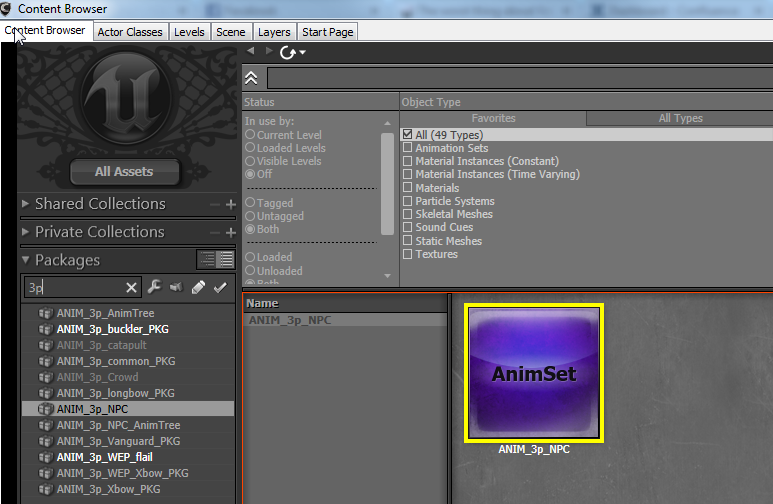
By going into the Content Browser and filtering 3p, you can bring up the AnimSet "ANIM_3p_NPC". Double Click the AnimSet Icon highlighted below.
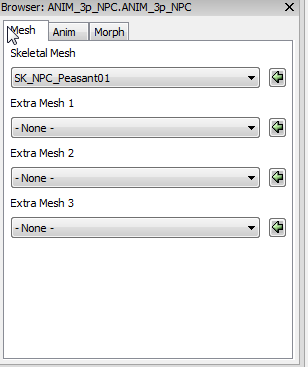
In the Mesh tab of the AnimSet viewer, set the Skeletal Mesh to SK_NPC_Peasant01. This is mainly for previewing the animations.
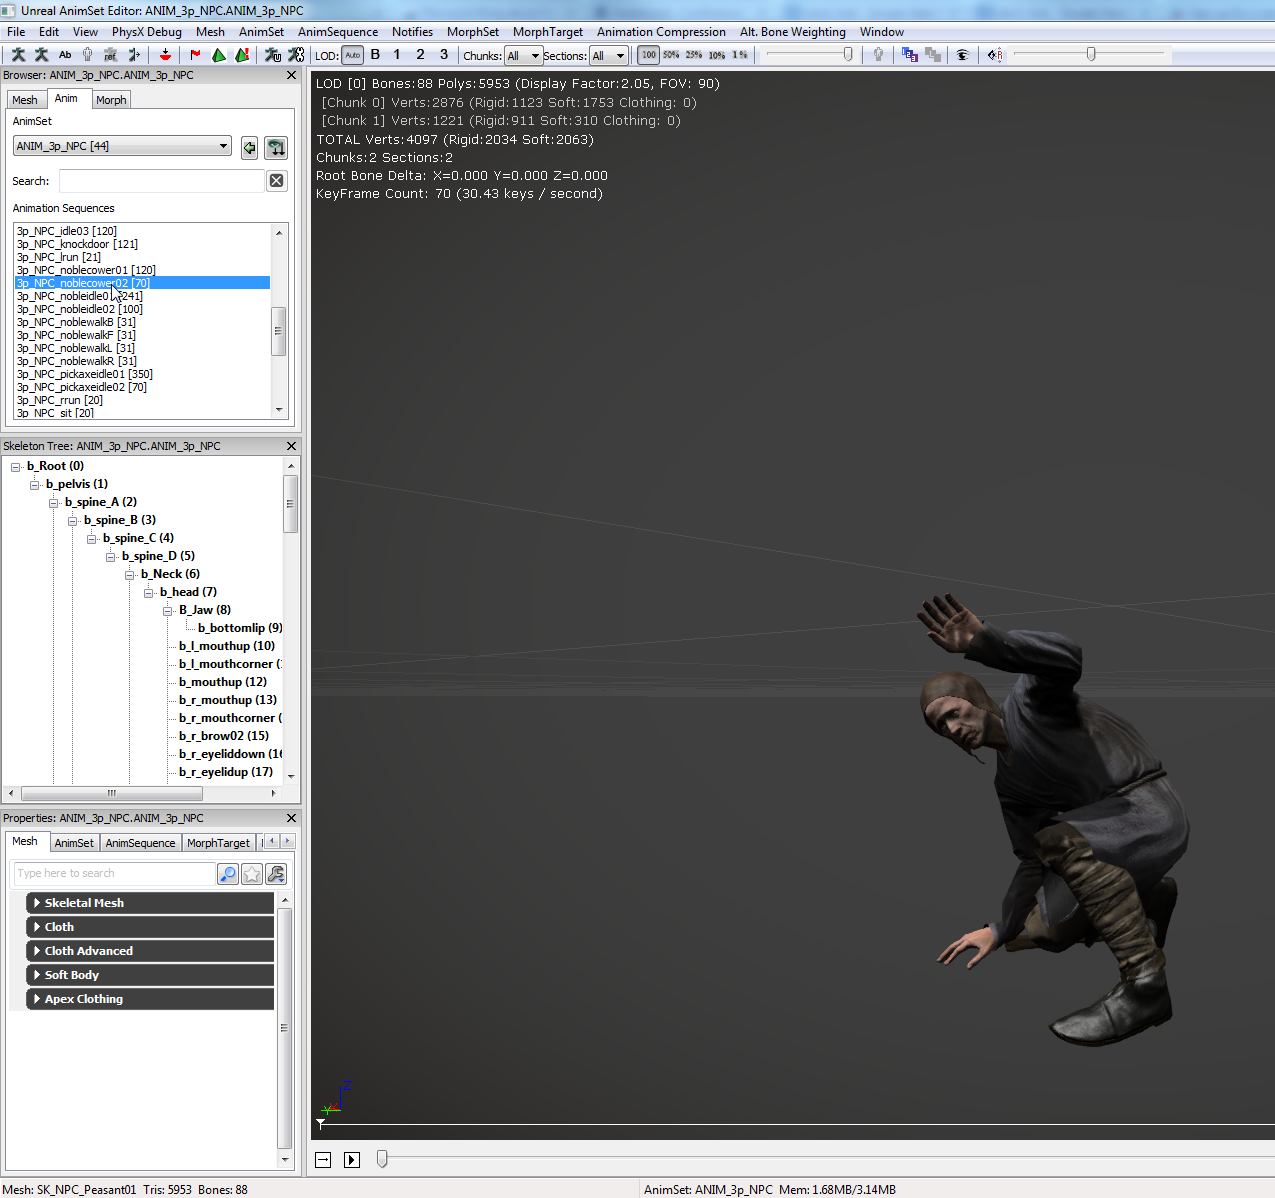
Change the tab of the Browser to Anim. Make sure it is set to ANIM_3p_NPC. From here, you can preview the animations, and more importantly, grab the file name for the NPC Play Anim action in Kismet. You can Right Click the name of the Animation in the Sequence Browser, and click "Copy Sequence Name to Clipboard".
Return to Unreal Kismet. Select the NPC Play Anim action, and paste the animation name, in this case "3p_NPC_noblecower02". There are various other settings here, most of which are explained by tool tips when moused over. For this example, just mimic what is checked off below.
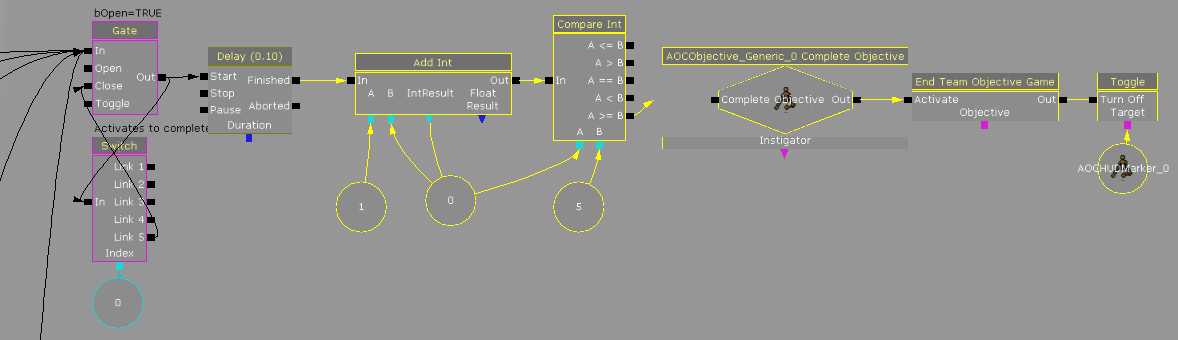
All Peasants dying completes the Kill Objective:
The final step of this objective is to keep track of how many Peasants have been killed. To track how many Peasants have been killed, we will use some simple Kismet math. Each of the death events fires into an already open gate. Each time, it adds to a switch, which exists to close the gate after all the peasants have died. Each Death also passes through the gate and a minor delay into the next Add Int Action.
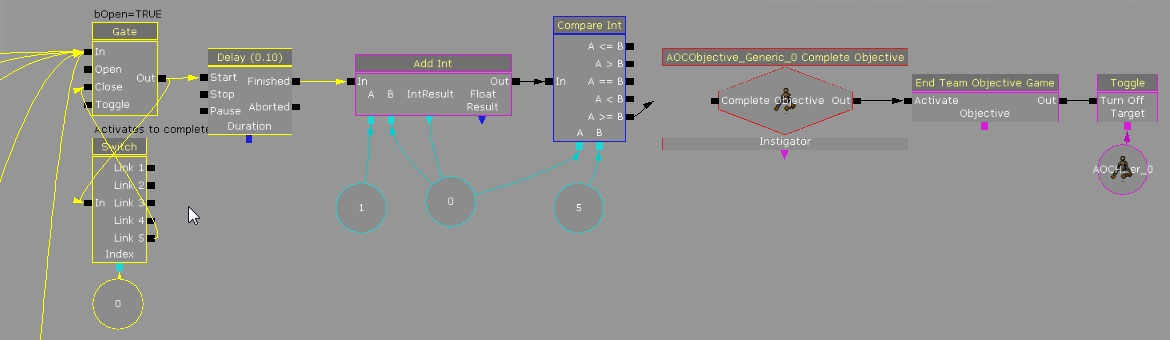
Add Int is taking A(1) and adding it on to the total. So in simple math, 1+x=x, with x being carried to the equation each time. So it starts as 1+0=1, 1+1=2, 1+2=3, and so on. That result is then checked by a Compare Int Action. It simply takes the result, and compares it to the number needed to complete the objective. In this case, it is using A >= B, which means A needs to be greater than, or equal to (5) to activate the AOCObjective_Generic Complete Event, effectively ending the objective.